Dairy-Free Coconut Orange French Toast

Coconut_Orange_FT

Dairy Free Coconut Orange French Toast

There are just those days when I really seem to want breakfast. I tend to not be a breakfast eater normally, but there are those weekend days when there is just nothing better than a good meal. This past weekend was one of those days where we had a long day planned, so we started the day with a yummy plate of French toast.

Of course with a dairy allergy there had to be a milk substitute involved. Following along with my new love for coconut milk, this was my choice. Now I know everybody has their own favorite way to make French toast, whether its with fruit or filled or crusted with cereal. One of my favorites has always been with some orange zest in it. I like the cleaner, less heavy taste of French toast with a little citrus. So I combined orange and coconut and it was super good, so now I have a new variation for weekend breakfast.

Coconut Orange French Toast

3 whole eggs
¼ cup vanilla coconut milk
1 tsp vanilla extract
2 tbsp coconut flavored sugar (or plain sugar)
zest of one whole orange (1-2 tsp)
1 tsp of fresh orange juice
8 slices of bread (I used sliced potato bread)

Butter, margarine or veggie oil for the skillet.

Combine all the ingredients in a shallow dish. Whisk briskly to be sure all of the egg is mixed in well. Heat a skillet or griddle on medium heat with butter or oil. When warm, dunk your bread of choice in the egg mixture then flip to coat both sides. Grill the toast on one side for a few minutes until a nice golden crust is formed. Flip the toast and grill on the second side until the same color is reached. Work in batches to dunk and then grill toast until you have used all the batter. I made 8 slices of French toast with this amount of batter. I serve the French toast with sliced oranges (convenient way to use the zested orange) and maple or coconut syrup. I have coconut pancake syrup that is good (but sweet) with this French toast. The coconut flavored sugar that I used here is a product I get in Hawaii, but plain granulated sugar would work as well. In the past, I have also sprinkled this French toast with shaved coconut. This recipe has a very subtle coconut flavor but the lovely orange flavor is certainly dominant. And you can’t beat a great breakfast in 15 minutes!

Vacationing with Food Allergies

DCL_Funnel

So the start of this summer has been super busy and I have been away from Toothless Wahine for several weeks. Since summer is the season of vacations, I thought I would give some thoughts on eating while on vacation for those with food allergies. When you are at home, it is always easier to control what you eat and to be sure foods are allergy friendly. When traveling, this always becomes much more of an issue. I have gotten very good at asking questions everywhere I eat but there are places that make it much easier than others. My favorite vacation place where I know my allergies will be accommodated may surprise you.

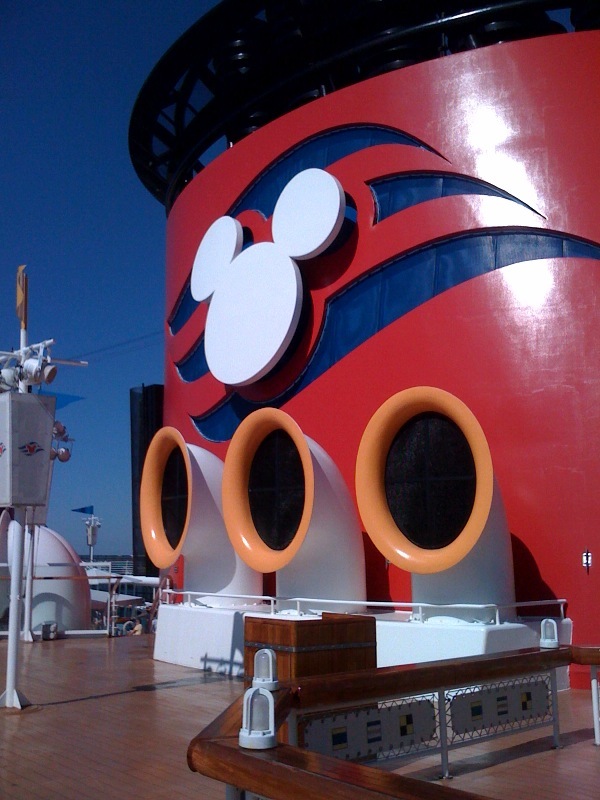
I would never have thought that a cruise ship would be super accommodating to food allergies. We have had the fortune to take a cruise several years in a row and have found several things that make these moving vacations amazing. The unpacking once aspect is awesome. It is also fun to see a different port of call, or even a different country every morning when you wake up. And for me, the constant supply of custom-made allergy friendly meals is amazing. As some of you may have noticed, I have a thing for Disney (just look at all of my blog photos). So of course the cruise line that I speak of is the only cruise line that does fireworks at sea, has a ships horn that plays When You Wish Upon a Star, and of course that has Mickey Mouse on the ship funnels. Disney Cruise Line not only offers amazing cruises with the famous Disney magic but great ports of call, and extreme attention to details (especially to food allergies).

With my food allergies we have always been very leery of traveling out of country, especially to someplace where there is any language barrier. Trying to order meals with a language barrier is a nightmare to me. A great way to do this has turned out to be on a cruise ship. We have explored part of Europe, the Caribbean, Alaska, and part of the west coast on Disney Cruise Line (DCL) ships. The wonderful thing here is, I am free to go explore the ports of call during the day, and then I can come back to the ship for meals that I know are safe. That eliminates my fears of dealing with food allergies in foreign countries.

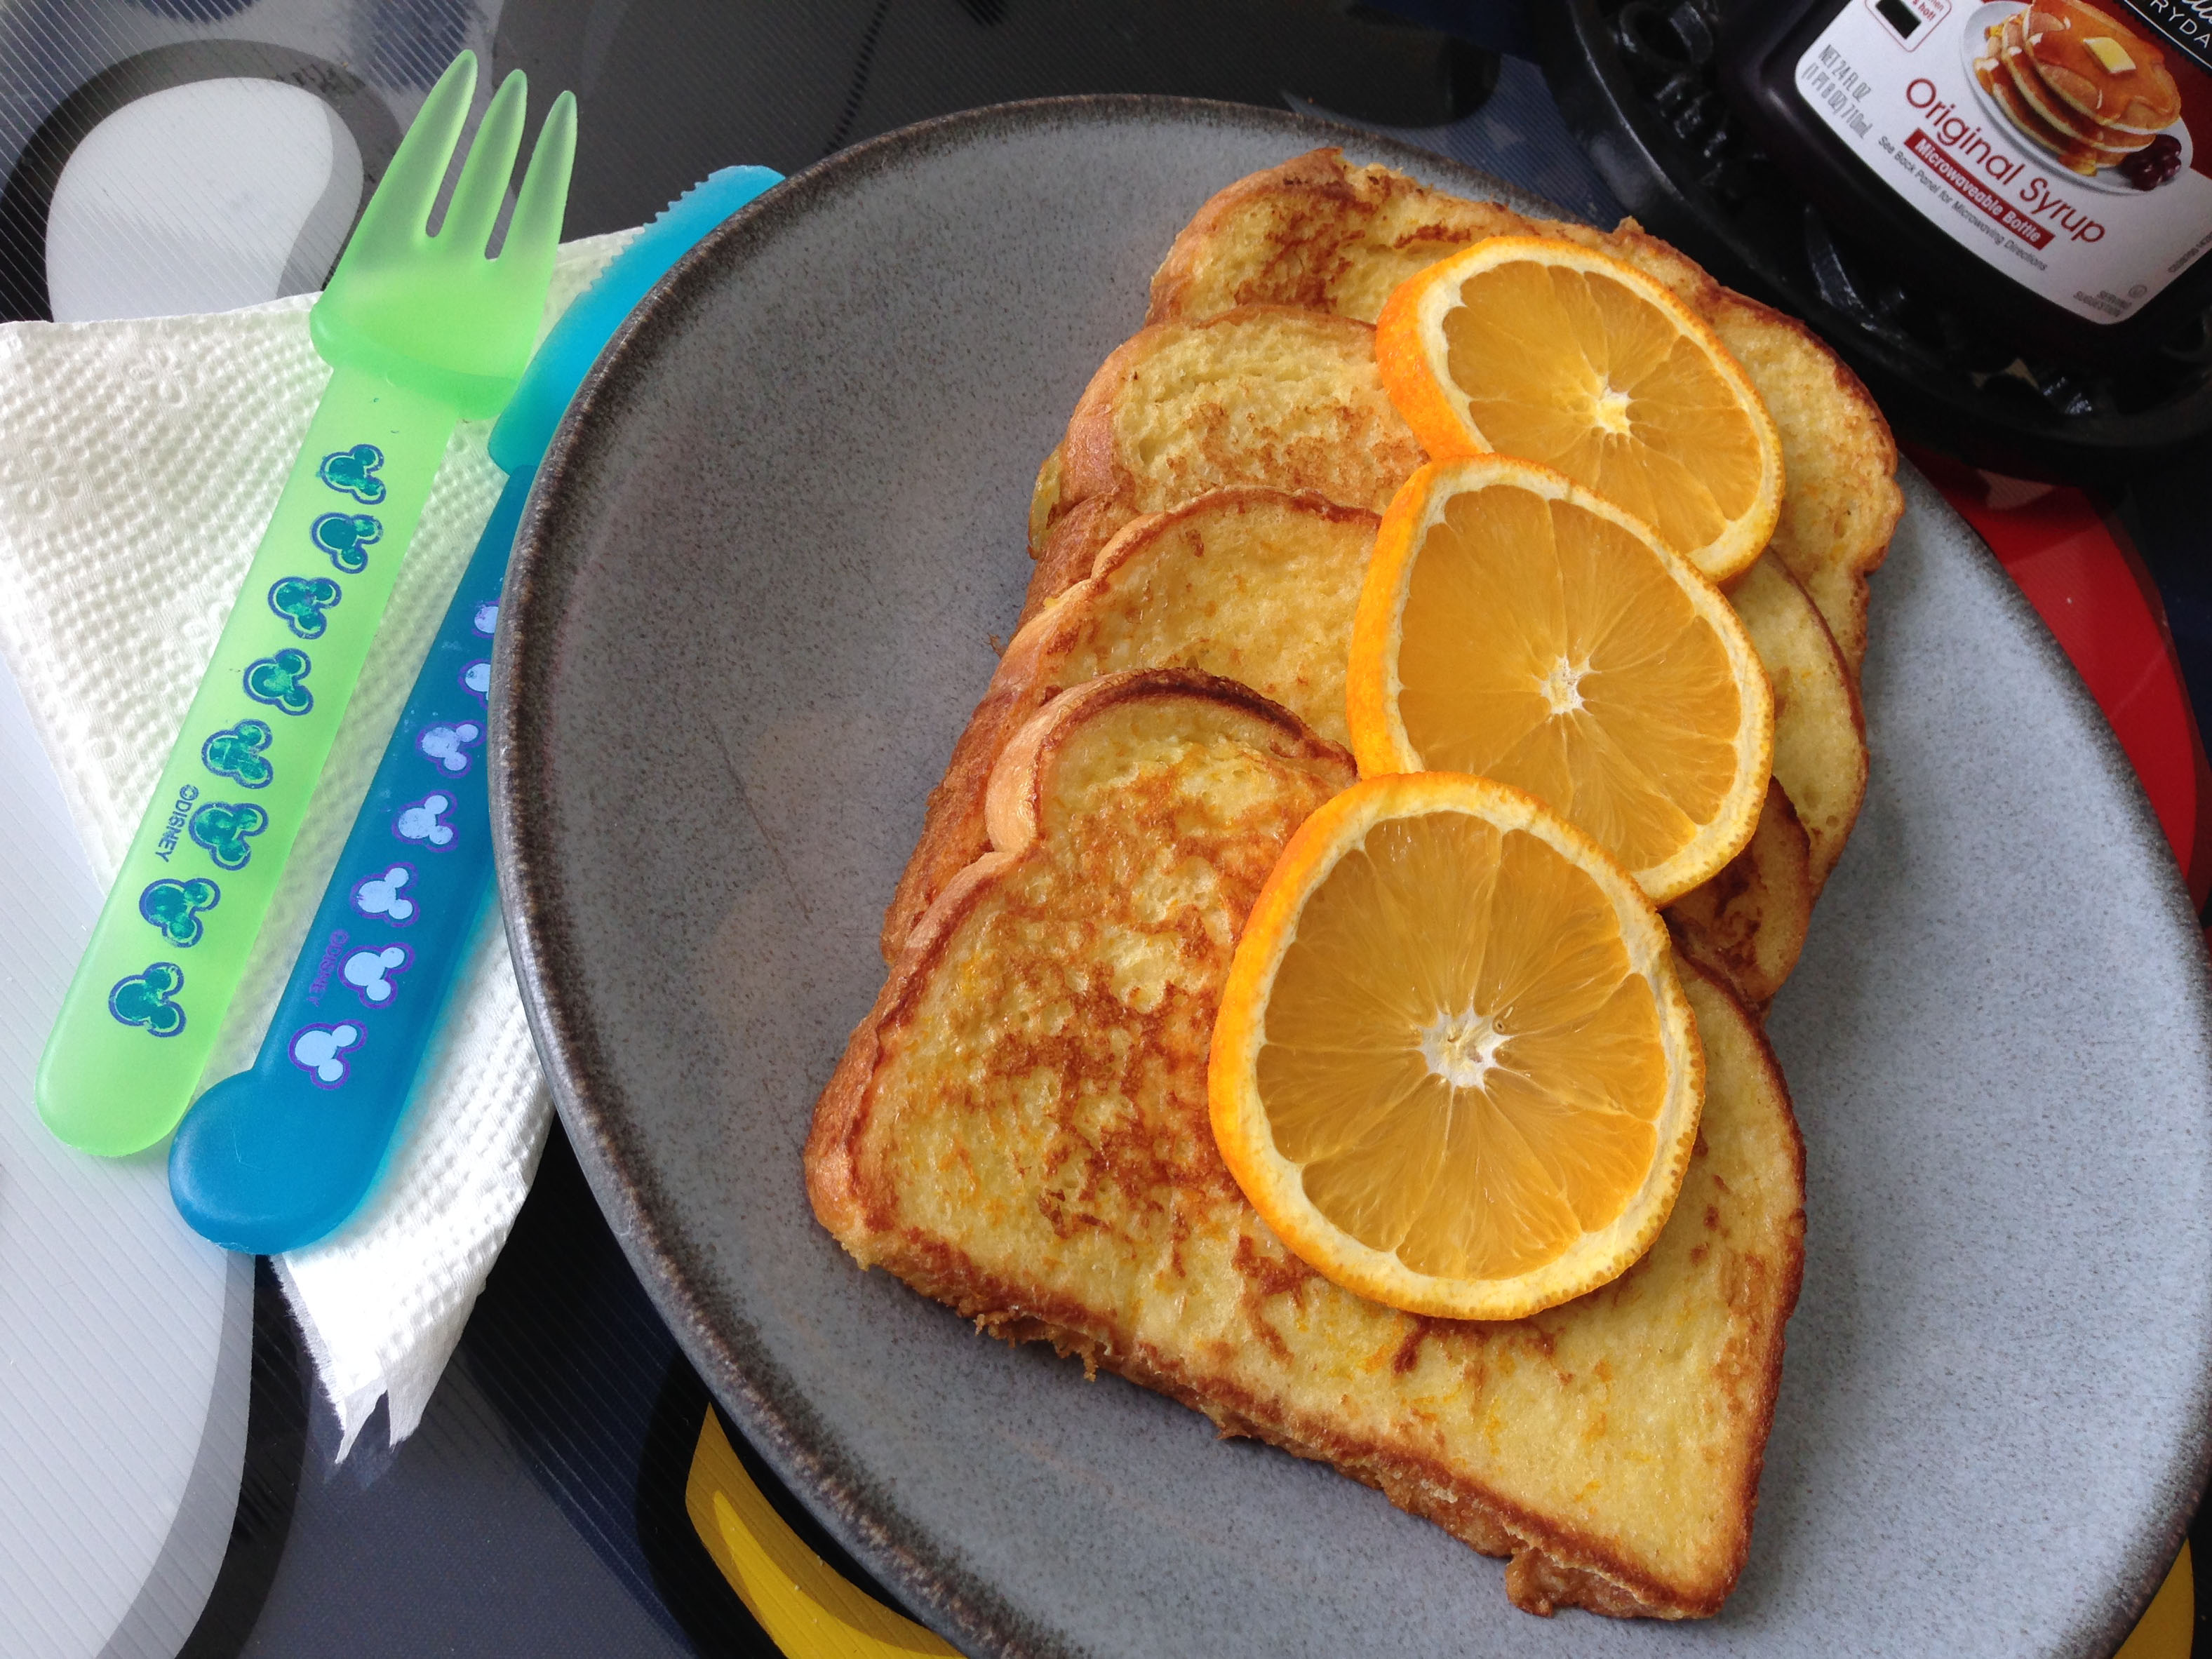
The most amazing part of DCL is how they handle dining on the ships. Each of the four DCL ships (the Magic, the Wonder, the Dream and the Fantasy) have three restaurants on-board. As a guest your family will rotate through each of the restaurants so you get to experience the different menus, themes and entertainments. The best part is that your wait staff rotates with you to every restaurant. Which means you get to know your staff and they get to know your likes and dislikes. For those with food allergies, you only have to explain your concerns and restrictions once. Then you have the same people helping you for the duration of your cruise. A food allergy sufferers dream!! Your head server, server and assistant server will all help with your food allergies all cruise long. We have also had the amazing ability to request the same head server for several cruises in a row, so the service has been AMAZING!! I have the ability to get custom made meals every night. Our servers help me look through the next days menu and pre-order meals that work not only for my allergies but also for my lack of chewing ability. They have helped to come up with customs desserts every night so there is always something I can eat. DCL is very careful with food allergies, as they have a separate kitchen area for allergies. They also stock certain allergy friendly products. DCL can easily accommodate dairy, gluten, nut (both tree and peanut), vegetarian, vegan and probably many other allergies. I have figured out that DCL always has rice milk and rice dream on board. You just have to know to ask and find somebody who knows where they are stored.

DCL has nightly drink specials (usually one alcoholic and one kid friendly drink per day). By asking our favorite head server, I have been able to get many of these drinks made with rice dream instead of ice cream. Any cast member is always willing to check on ingredients in dishes at any of the breakfast or lunch buffets. There is also usually one restaurant open for breakfast every day, and the servers there are always able to get custom plates made. I have also been able to get packed lunches to take with me to port days by arranging it the night before with our head server. Your server also has the ability to get custom meals ordered for lunch on Castaway Cay if your cruise includes a day there. (Castaway Cay is Disney’s private island in the Bahamas that all Caribbean cruises will spend one day visiting.) Cruises are one of the few places that I get taken better care of, and I eat better than my family without food allergies. And I love it and cannot recommend DCL cruises highly enough if you have food allergies!!

(And I know it may sound like I am a spokesperson for Disney Cruise Line but I am not. We have traveled and visited Disney parks for years. They have always been willing to work with me on my food allergies. In my opinion DCL goes above and beyond to help with food allergies and with all of my allergies and my current inability to chew, I cannot express how much I enjoy being catered to. I have even had our head waiter helping to cut my steaks since I have to cut them to tiny pieces so I can just swallow and not have to do any chewing. I cannot say enough how wonderful Disney Cruise Line has been for me, which is also why we are vacationing on a ship with Mickey Funnels yearly!)

Toothless_SignatureJaime

Orange Brownies

Orange_Brownies

Over the years I have become very good at altering recipes so that I can make them around my food allergies. Even though I can alter almost any recipe, often the best are those that don’t require any altering. I tend to get excited when I find something that I can eat right off the bat. How cool is it to find a brownie recipe that I can eat without any changes? These blond brownies are great because there is no chocolate or cocoa to try to substitute or eliminate. For me, it is exciting to find a brownie recipe that does not require any chocolate, since I have never had real chocolate and I am not a fan of cocoa or chocolate flavored baked foods. This wonderful orange brownie recipe originated from Paula Dean and the recipe can be found on foodnetwork.com.

Orange Brownies

1 ½ cups all-purpose flour
2 cups granulated sugar
1 tsp salt
1 cup (2 sticks) softened butter or margarine
2 tsps pure orange extract
1 tsp grated orange zest

Preheat the oven to 350 degrees and then grease a 13x9x2 inch pan. Stir together the flour, sugar and salt in a large mixing bowl. Add in the butter, eggs, orange extract, and orange zest. Beat until well blended with a hand held mixer. Pour the batter into the prepared pan. Bake for 30 minutes or until golden brown and well set. Allow brownies to cool completely before slicing into squares.

There is a cream cheese frosting that can be used with this recipe. However, I love these brownies just as is; they are plenty sweat and yummy without any topping or frosting. I am sure you could also use a simple butter cream frosting with a little orange flavoring if you really want to frost these beauties. I also highly recommend trying these brownies with a little bit of vanilla rice dream. Enjoy!!

Toothless_SignatureJaime

Fresh Tomato Soup

Tomato_Soup

Since dealing with cancer, I have become a lot more aware of the nutrition in foods. I have also had to concentrate more on packing all the nutrition that I can into any dish I make. I can only eat small portions of food per sitting, so for me it’s important to make every bite count. The one thing that seems to work very well for me is vegetable soups. Veggies can be difficult to eat because they take lots of chewing, or I have to cook them until they are dead and mushy which is no fun. Blended veggie soups are great, because it removes the chewing element and there is still all that great veggie nutrition and fiber. I shared my butternut squash soup earlier, and today I am going to share my version of a tomato soup (this original recipe was from Foodnetwork.com). This soup is great in the summer when tomatoes are cheap, or when your garden suddenly provides pounds of tomatoes all at once. Maybe the best thing about this recipe is that my husband, who hates tomato soup, really likes this one! It helps that there are several veggies in here, so it is not just plain tomato soup!

3 tbsp olive oil
1 ½ cups chopped red onions (about 2 onions)
4 carrots, peeled and chopped
1 tbsp minced garlic (3 cloves)
4 pounds of vine ripened tomatoes, coarsely chopped (5 large)
1 tbsp sugar
1 tbsp tomato paste
¼ cup packed fresh basil leaves (plus some julienned basil for garnish)
4 cups vegetable stock
2 tsp kosher salt
1 tsp freshly ground black pepper

Heat the oil in a large dutch oven, or soup pot over medium-low heat. Add the onion and carrots and sauté for ten minutes or until tender. Add the garlic and cook for a minute. Stir in the tomatoes, sugar, tomato paste and the basil. Add in the vegetable stock, salt and pepper. Stir well and bring the soup to a boil. Then lower the heat and simmer for 45 minutes until the tomatoes are tender. Process the soup with an immersion blender, normal blender or food mill, depending on how chunky or smooth you want your soup. Reheat the soup over low heat. Serve with julienned basil as garnish. You can also garnish and serve with croutons, fried onions or crusty French bread if desired.

This soup is wonderful with any kind of tomatoes I have tried. I usually pick whatever type of tomatoes look good in the store that week, whether that is vine ripened, roma or heirloom. I also tend to use whatever kind of onions I happen to have around, which can be yellow, sweet, Vidalia or red. Once the soup is blended it is also easy to add small soup sized pasta to add some extra nutrition and bulk to this soup. I love adding about ¼ cup of orzo or stelline pasta. Heads up, you may have to add a little extra stock or water if you add pasta. I love making this version of tomato soup because I know that it has so much more nutrition than a can of condensed soup (and it has less salt). I also love that I can get my husband to eat his one! ☺

Toothless_SignatureJaime

Carbonara-Style Pasta

Asparagus_Carbonara

Carbonara-style Tagliatelle with Asparagus and Lemon-Herb Breadcrumbs

When I found this recipe I was super excited. Not only was it very easy to make this pasta dish dairy free (just skip the cheese), but it is a great recipe when I am in a hurry and just want a quick dinner. It is also very easy to make this dish soft enough that I don’t have to chew it a ton. I have used leftover asparagus and several different leftover proteins in this dish and it is always yummy (the photo above included left over ham steak and whole wheat fettuccine). I found this recipe on Foodnetwork.com and I have made it so many times, it has never been the same twice, but it’s always yummy!!

So here is the basic recipe:

1 pound asparagus, trimmed and washed
4 T extra virgin olive oil (plus extra to drizzle on the top)
Kosher salt
2 T butter or margarine
Grated lemon zest (2 lemons)
1 cup breadcrumbs
¼ cup finely chopped fresh chives
¼ cup finely chopped flat-leaf parsley
1/3 pound pancetta, chopped
1 tsp black pepper
4 cloves of garlic, grated
½ cup dry white wine
3 egg yolks
1 pound egg tagliatelle pasta (or any pasta shape)
1 cup grated pecorino cheese

Trim the rough ends off of the asparagus and lightly drizzle with olive oil. Grill the asparagus until lightly charred and tender, about 7 to 10 minutes. Cut into 1-inch pieces on an angle. Heat a large pot of salted water to boiling. In a small skillet, heat 1 T of olive oil over medium heat. Add the butter and heat until melted, then add in the lemon zest and breadcrumbs. Stir until moistened and golden brown. Then add in the chives and parsley and take the skillet off the heat. Heat the remaining three tablespoons of olive oil in a large skillet over medium heat. Add the pancetta and the pepper and cook for three minutes, stirring well. Add the garlic and cook while stirring for another 2 minutes. Deglaze the pan with the wine and turn the heat down to low. Lightly beat the egg yolks in a small bowl. Cook the pasta in the boiling water until al-dente (or until soft if you are toothless like me). Save 1 cup of the cooking liquid and drain the pasta. Beat the reserved water into the egg yolks to temper them. Add the asparagus to the pancetta mixture and heat through. Mix the pasta into the skillet with the asparagus and the pancetta mixture. With the heat off, pour the egg mixture over the top of the pasta mixture and toss for a minute or two. Here is where you add in the cheese if you like, I omit the cheese and simply put it on the table for those who want it. Put the pasta in a serving dish and coat with the lemon breadcrumbs, drizzle with a little extra-virgin olive oil if desired and serve.

The thing that I love most about this dish is that I tend to make it to use leftovers and it makes for a super fresh twist every time. I have used leftover asparagus many times. I have also served this with leftover parmesan crusted chicken for my husband to take for lunch. When I have leftover pork chops or ground pork and veal meatballs or leftover ham or ham steaks I love to add them into this recipe. When I have the last bit of a loaf of bread that is getting hard, I like to make my own breadcrumbs that I can use here. I have also made a small batch of this recipe when I have left over pasta that I need to use, any crazy shaped pasta will work. So try this recipe out, then try diggin’ in your fridge to see what you can add to enhance this in your own way!

Toothless_SignatureJaime

Dairy/Gluten Free Peanut Bars

CornFlake_Bars

When I was younger, finding really great desserts that were dairy free was always a challenge. We found a recipe for corn flake peanut butter bars that was awesome! This recipe is great because it is dairy free if you want it to be, but you can also add chocolate to these bars for those without allergies. This was always our go to recipe for when we were taking treats to school, Girl Scouts, church events and play dates. These peanut butter bars were always a big hit, whether they had chocolate chips, caramel chips, peanut butter chips or if they were plain. I also realized later these are gluten free depending on what brands of ingredients you use. These do have peanuts (lots of them!) so they are definitely not for those with peanut allergies.

1 cup light corn syrup
1 cup brown sugar
1 cup peanut butter
1cup peanuts (optional)
6 cups corn flakes

Optional:
6 oz chocolate or other type of chips
1 Tbsp veggie oil

Using a microwave safe glass bowl, combine the corn syrup and brown sugar. Heat in the microwave for 4-5 minutes until melted and boiling (you want the sugar to melt so the sauce is not gritty). Stir in the peanut butter until well mixed. Pour the liquid mixture into a large bowl with the corn flakes and peanuts. Mix to coat the cereal well. Press mixture into a well-greased 8×12 inch glass baking dish (this is a great job for little hands ☺). In a separate microwave safe bowl, combine the chocolate chips with the vegetable oil. Microwave for 1-2 minutes until the chips are melted and completely smooth. Spoon the chocolate mixture over the corn flake bars forming a nice even coating. Refrigerate for at least one hour until chocolate has set. Then slice bars to desired size. Store bars in a cool (refrigerated) place.

In our house we always halved the amount of chocolate chips and only coated half of the bars with chocolate so I could eat the plain half. Occasionally you can find dairy free “chocolate” chips and feel free to use these if you like. I did figure out recently that I could use carob chips in this recipe and they are quite tasty (but they can be hard to find and don’t melt as smoothly). You could also use nice dark chocolate bars for the topping if you are a dark chocolate lover. I also have recently started making these without the peanuts as I no longer enjoy the crunchy nuts because they are hard to chew (without teeth). I think my favorite thing about this recipe is that it is super easy and kiddo friendly if you have young ones who like to help in the kitchen. You can also put the mixture in greased muffin tins to make individual little bars. By putting out candies and other toppings these can be fun at a kiddo birthday party activity where everybody can decorate their own treat! Once they are chilled you can also use cookie cutters on these to make fun shapes. So try these out, then see what variations you can create and share them here!!

Toothless_SignatureJaime